How to use a cookie stamp | Ways for using cookie stamps for cookies
Get professional-looking cookie for special occasions or parties with these easy tips on how to use a cookie stamp! Learn the materials, tools, and techniques all in one place.
Contents
- Introduction
- What are cookie stamps?
- Which type of cookie stamp is best?
- Traditional wooden cookie stamps
- Silicone cookie stamps
- Customized cookie stamps
- Cookie Stamp ideas
- How to make cookies | sugar cookies | online
- Baking instructions for cookies | dough
- How to make stamped | stamped cookies
- Tips for the question “How to use a cookie stamps ?”
- Frequently Asked Questions
- Conclusion
Introduction
Baking cookie is one of the most satisfying activities that you can do in your kitchen. There is something about the aroma of fresh cookies baking in the oven that brings about that warm and fuzzy feeling of home. However, if you are looking to take things up a notch, you might want to try using cookie cutters or a cookie stamp. A cookie stamp is an excellent kitchen gadget that allows you to personalize your baked goods and make your cookie look even more inviting and special. If you are wondering how to use a cookie stamp effectively, keep reading!
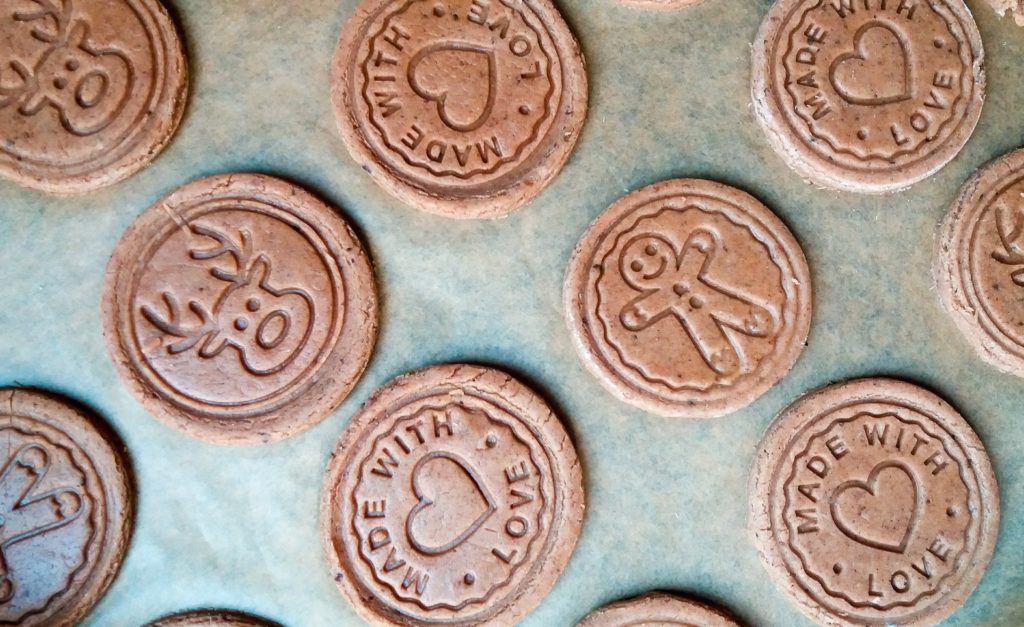
At their core, stamps are just glorified cookie cutters, which allow you to create intricate designs on top of your cookies. They are fun to work with and come in various shapes, sizes, and styles. From Christmas trees to snowflakes, flowers to stars, and even personalized initials, stamp is a perfect way to give personality to your cookies.
When it comes to baking homemade cookies, using a cookie stamp can add an extra touch of personalization and creativity. Not only are they fun to use, but they also create unique imprints on your cookies that make them stand out. However, with so many different types of cookie stamps available in the market, it can be overwhelming to determine which one is best for you. In this guide, we’ll discuss the different types of cookie stamps and how to use a cookie stamp.
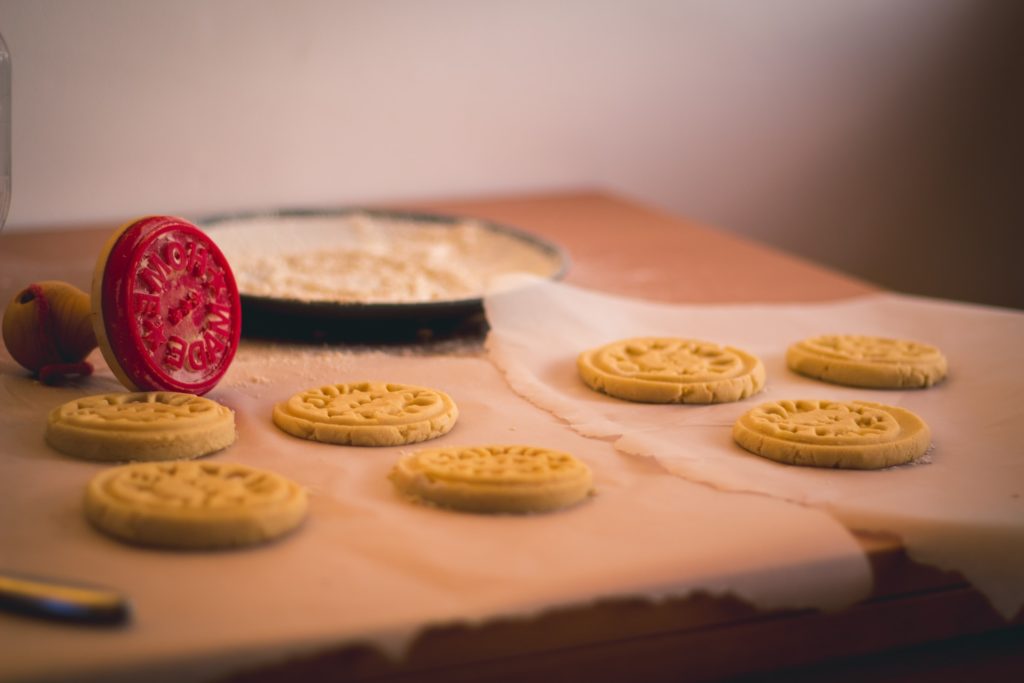
Traditional wooden cookie stamps have been around for centuries, and they are still a popular choice among bakers. Made from wood or terra cotta, these stamp usually come in simple designs such as flowers, stars, or holiday-themed shapes. To use a traditional wooden stamp, simply press the desired design into your rolled-out cookie dough before baking. The result is a beautifully imprinted design on your cookie that adds a rustic and charming touch.
Silicone cookie stamps are a modern take on the traditional wooden ones. They come in various designs and are made from food-grade silicone, making them safe to use on your cookies. To use a silicone cookie stamp, simply press the design into the rolled-out dough and peel it off gently. Unlike wooden stamps, the silicone ones are flexible, making it easier to remove them from the dough without causing any damage.
For those looking for a more personalized touch, customized cookie stamps are an excellent option. These stamps can be made with your own designs and are usually made from food-grade plastic or metal. They work similarly to the traditional wooden stamps, but they allow you to create unique imprints that represent your personal style.
Cookie Stamp ideas
Now that you’ve got the basics of “How to use a cookie stamp” covered, let us explore some creative and unique design ideas that’ll make your cookies stand out.
- Sprinkle Cookie: Use a star stamp to create an indentation and then fill it with sprinkles or sanding sugar before baking.
- Personalized Cookies: Use letter cookie stamps to create monogrammed cookies for special occasions such as birthdays or weddings.
- Seasonal Cookies: Use designs such as a pumpkin or ghost for Halloween, a tree or bell for Christmas, a heart shape for Valentine’s day, or a flag for Independence day for your cookies
- Cute Animal Cookies: Use an animal-shaped cookie stamp to create bear, owl, or fox cookies and decorate cookies however you want.
Prepare to indulge in this effortless Sugar Cookie recipe, it is simply ideal for these delectable treats!
Ingredients for cookies
- 1 cup (2 sticks) unsalted butter, softened
- 1 cup granulated sugar
- 1 large egg
- 2 teaspoons vanilla extract
- 3 cups all-purpose flour
- ½ teaspoon baking powder
- Pinch of salt
- In a mixing bowl, cream together the butter and sugar until light and fluffy.
- Beat in the egg and vanilla extract until well combined.
- In a separate bowl, combine the flour, baking powder, and salt. Slowly add it to the wet mixture and mix until well incorporated. The dough should be soft but not sticky. If it’s too sticky, add more flour as needed.
- Divide the dough into two equal portions, flatten them into discs, and wrap each one in plastic wrap. Refrigerate for at least 1 hour before using.
- Preheat your oven to 350°F (175°C) and line a baking sheet with parchment paper.
- Roll out the chilled dough on a floured surface to about ¼ inch thickness.
- Use a cookie cutter to cut out your desired shapes and transfer them to the prepared baking sheet.
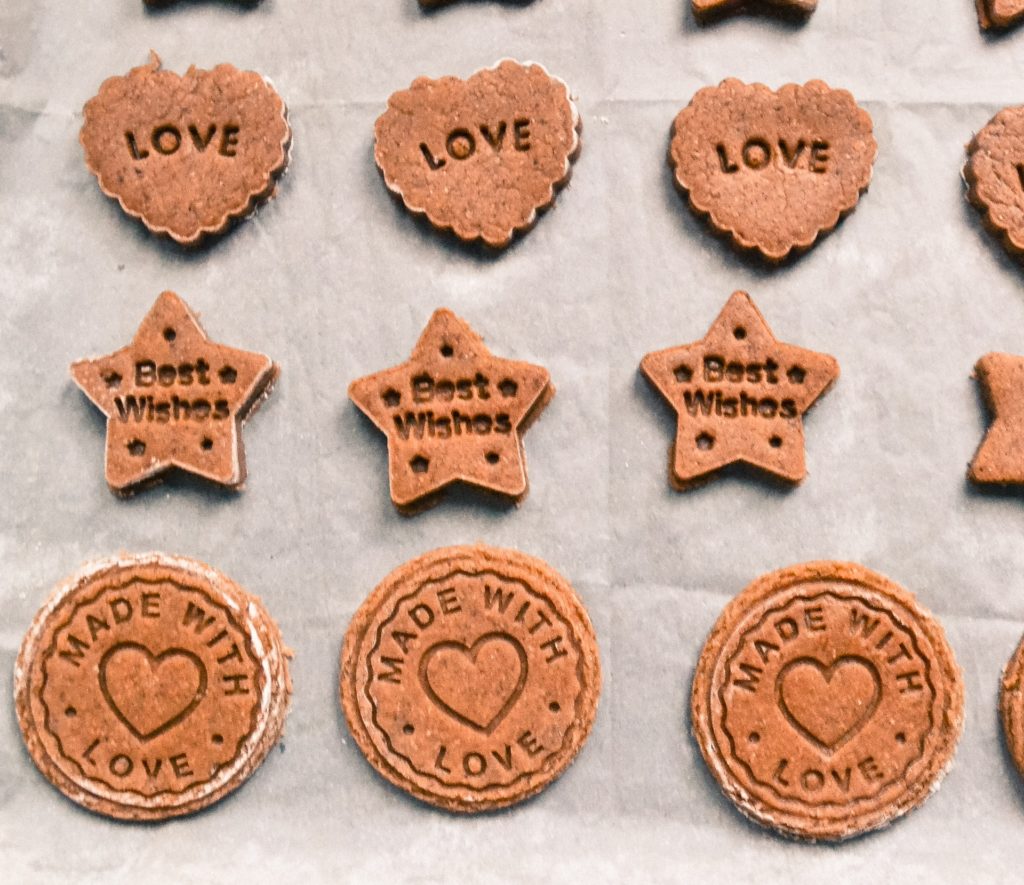
- Lightly press your cookie stamp onto each cookies, making sure not to press all the way through.
- Bake for 8-10 minutes, or until the edges are lightly golden.
- Let the cookies cool completely before removing them from the baking sheet.
- Decorate as desired and enjoy your delicious and beautifully cookies!
You Will Aslo Need
For this recipe, you will require a stand mixer, a couple of baking sheets, a baking rack for cooling the cookies, parchment paper for lining the pans, and of course, cookie stamps! Details regarding the specific stamps I used and where to purchase them will be provided below.
Stamping cookies is a great way to make them look more enticing and appetizing. Creating stamped cookies is relatively easy, and all you need is some basic equipment and ingredients.
Equipment:
Before we proceed with the instructions, let’s have a quick look at the equipment required for stamping cookies.
- Cookie dough: This is the base ingredient for making cookies. You can either make your own cookie dough or use store-bought pre-made dough.
- Cookie Stamp: This is the most crucial equipment for stamping cookies. You can find cookie stamps in various designs, shapes, and sizes to suit your preference.
- Rolling pin: To flatten out the cookie dough evenly, you will need a rolling pin.
- Baking sheet: The baking sheet is used to place the cookies before putting cookies in the oven.
- Oven: You will need an oven to bake the stamped cookies.

Instructions:
- Preheat your oven: Before you start making your stamped cookies, preheat your oven to the desired temperature as mentioned in the cookie dough recipe.
- Roll out the dough: Take your cookie dough and roll it out onto a floured surface using a rolling pin. Make sure that the dough is evenly rolled to ensure uniform stamping.
- Stamp the cookies: Once you have flattened the dough, use your cookie stamp to imprint designs on the dough. Gently press down on the stamp, making sure not to apply too much pressure.
- Cut out the cookies: After stamping the dough, use a cookie cutter to cut out the stamped cookies into desired shapes.
- Place on baking sheet: Carefully transfer cookies onto a lined baking sheet, leaving enough space between each cookie for them to expand while baking.
- Bake in oven: Put the baking sheet with the stamped cookies into the preheated oven and bake according to the cookie dough recipe.
- Let them cool: Once done, take the cookies out of the oven and let them cool on a cooling rack before serving or storing them.
- Optional step – Decorate: You can also decorate your cookies with icing, sprinkles, or other toppings to add extra flavor and visual appeal.
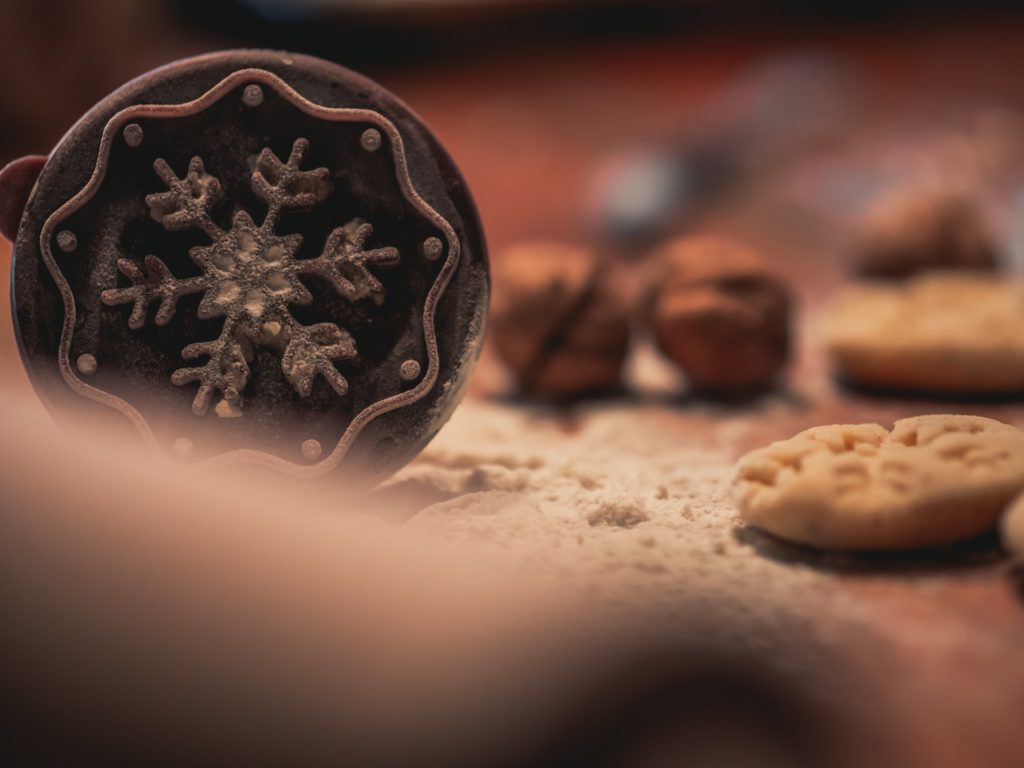
Cookie stamps are a great way to add some personality to your baked goods. Not only do they create a unique design on each cookie, but they also make for a fun and interactive baking experience. Here are some tips to help you get the most out of your cookie stamps:
- Choose the right dough: The type of dough you use can greatly affect how well your cookie stamp works. A dough that is too sticky or too crumbly will not hold the impression of the stamp well. It’s best to use a firm dough that holds its shape and doesn’t spread too much while baking.
- Chill your dough: Before using your cookie stamp, make sure to chill your dough for at least 30 minutes. This will help the dough hold the stamp’s impression better and prevent it from sticking to the stamp.
- Flour your stamp: To prevent the dough from sticking to your cookie stamp, lightly dust it with flour before each use. This will ensure a clean and defined design on each cookie.
- Test on a small batch first: If you’re using a new cookie stamp or trying out a different type of dough, it’s always a good idea to test it on a small batch of cookies first. This will give you an idea of how the stamp works and if any adjustments need to be made.
- Use gentle pressure: When pressing the cookie stamp onto the dough, use a gentle and even pressure. Too much force can cause the design to flatten or distort, while too little may not leave a clear impression.
- Clean the stamp between uses: To ensure a clean and defined design, make sure to wipe off any excess dough with a damp cloth between each use. This will prevent any leftover dough from ruining the next cookie’s design.
- Let cookies cool completely before removing them: It’s important to let your stamped cookies cool completely on the baking sheet before removing them. This will prevent the design from smudging or breaking apart as the cookies are still soft and delicate when they first come out of the oven.
- Experiment with different stamps and designs: One of the best parts about cookie stamps is that there are endless possibilities for designs and patterns. Don’t be afraid to mix and match different stamps to create unique and beautiful cookies.
Frequently Asked Questions
How to use a cookie stamp on icing ?
Stamp can also be used on icing to create unique designs. To use a stamp on icing, first make sure the icing is smooth and has set slightly. Then, lightly press the stamp onto the icing with even pressure. Lift the stamp straight up to avoid smudging the design.
You can also add food coloring or edible glitter to your icing before stampingfor can be anything from simple shapes like hearts and stars to more intricate designs like flowers and animals.
How to use a cookie stamp with other types of dough ?
Cookie stamps can be used with various types of dough such as sugar cookie, shortbread, and gingerbread. However, keep in mind that different doughs may yield slightly different results due to variations in texture and moisture levels
How to use a cookie stamp for other types of baked goods ?
You can use a stamp on other types of baked goods such as pie crusts, pastry dough, and even bread dough. Just make sure to lightly flour the surface before stamping and adjust baking times accordingly. Get creative and have fun experimenting with different designs and recipes!
How to use a cookie embosser ?
A cookie embosser is a similar tool to a cookie stamp, but instead of an imprint, it creates an indentation on the surface of the dough. To use a cookie embosser, simply press the design plate onto rolled out dough with even pressure. Lift straight up and bake according to your recipe’s instructions. You can also use food coloring or edible dust to enhance the embossed design.
How to use cookie stamps on fondant ?
Cookie stamps can also be used on fondant to create fun and intricate designs. Roll out the fondant and lightly dust with cornstarch or powdered sugar to prevent sticking. Press the cookie stamp onto the fondant with even pressure, making sure not to twist or rock it. Lift straight up and cut out the stamped design using a round cutter or knife. You can then place it on top of your baked goods for a unique and professional touch.
Note: Always make sure that the fondant is rolled out evenly and not too thick before stamping, as this can affect the final result. Additionally, keep in mind that some cookie stamps may work better with fondant than others due to variations in texture and moisture levels.
- More articles: Tricks to Extend the Lifespan of Your Crumbl Cookies
Conclusion
Now that you know “How to use a cookie stamp ?“, Using a cookie stamp is simplistic, enjoyable, and adds an extraordinary touch to your cookie creations. It requires a little patience and practice – but trust us, it’s worth it! Remember always to choose stamp, prepare the dough well beforehand, and use the stamp with even pressure.
Enjoy the process and have fun creating a multitude of designs. Incorporate different flavors to your cookies, such as almond, vanilla, or even chocolate, for the ultimate sweet twist. Follow our tips mentioned above, and you’ll be well on your way to creating perfectly stamped cookies that will impress your loved ones.

I’m Belle Hudson , a cooking enthusiast and founder of TheCakeBoxofct.com . My ultimate goal is to provide complete customer satisfaction through a wide variety of cupcakes, homemade cakes, and a variety of dishes prepared in the kitchen. Whether you desire a remarkable birthday surprise , a special anniversary dessert , or even a delicious dish for a family dinner , rest assured that my creations are crafted to perfection. Made from the freshest and best ingredients , promising to satisfy every taste.

